
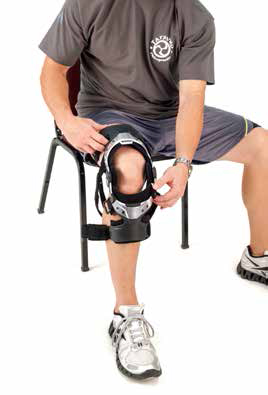
Step 1:
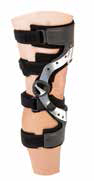
To Put On Your Brace: Townsend BOLD Knee Brace should be applied sitting down with your leg slightly bent at approximately 45 degrees of flexion. Before you tighten any straps, it is always important for you to properly position the brace on the leg. Because Townsend’s patented hinges mirror the anatomical motion of the knee, the brace will function best when the hinges are properly aligned at knee center (SEE ILLUSTRATION #1 in the box at the bottom of this page). Make sure each of the four straps that go across the back of your leg are open. Slide the frame of the brace onto your leg. The condyle pads attached to the inside of the hinges should press against the sides of your knee. If you have positioned the brace and hinges at the correct height on your leg, the middle of the condyle pads should line up with the upper third of your knee cap. If the medical professional who fit your brace did not adjust the length of straps and strap pads, you will need a pair of scissors so you can cut the straps and strap pads to the appropriate length NOTE: It is always better to put your brace on a little too high than too low.
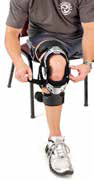
Step 2:
Tighten the upper calf strap (patented Synergistic Suspension Strap) that is just below the back of your knee. This strap should be tightened in the flexion fold behind your knee. This is the most important strap for keeping the brace secure on your leg and preventing it from slipping down. (SEE ILLUSTRATION #3 in the box at the bottom of this page).
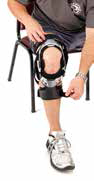
Step 3:
Tighten the distal (bottom) calf strap to secure the lower tibial band to your leg. You will see that the medial (inner) side of the lower band of the brace is contoured to fit the flat portion of your shin for maximum rotary control.
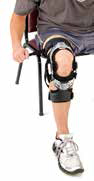
Step 4:
Next, tighten the two upper straps to secure the thigh section of the brace to your leg. The chafes that you feed the strap through can be angled to ensure the straps fit flat against the back of your leg.
Step 5:
As a final step, push down on the brace to make sure it is strapped securely and stays in place. We also recommend that you straighten your leg and retighten the lower thigh strap to achieve maximum control.
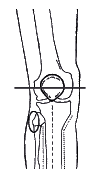
Illustration #1 (KNEE CENTER):
When you begin to put on your brace, it is important for the hinges to be aligned with knee center. This means the center of the hinges should press against the side of your knee in a position that corresponds with theupper third of your knee cap. Additionally, tightening the Synergistic Suspension Strap in the flexion fold behind your knee will help to ensure the hinges are at the correct height on your leg.
![]()
Illustration #2 (SHORTENING STRAPS):
The straps on your brace can be cut to any length. Simply remove the alligator closure from the end of the strap, cut the strap to the desire length, and reposition the closure onto the end of the strap. Be very careful not to cut any strap too short! Additionally, any comfort pad that is attached to the inside of a strap (see illustration) must be removed and cut shorter if the pad interferes with your ability to completely tighten the strap. You can cut the pad and re-center it on the strap.
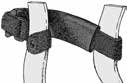
Illustration #3 (SUSPENSION):
The Synergistic Suspension Strap is attached to the outside of the frame and is designed to wrap ins ide between the brace’s lower shell and your leg. The strap is also angled to match the natural contour of the top of your calf muscle. This strap should be tightened in the flexion fold in the back of your knee.